Fall bird photography: Savannah Sparrow

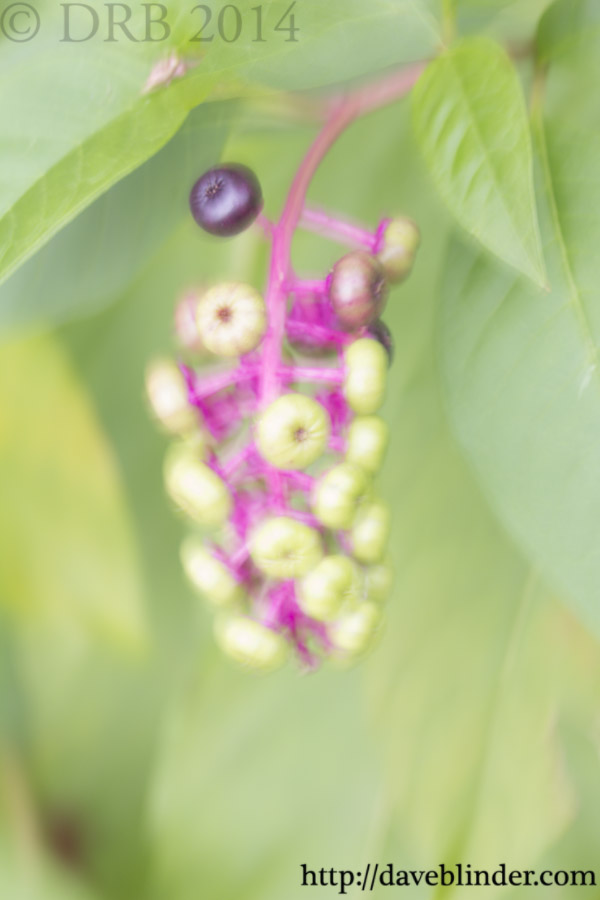
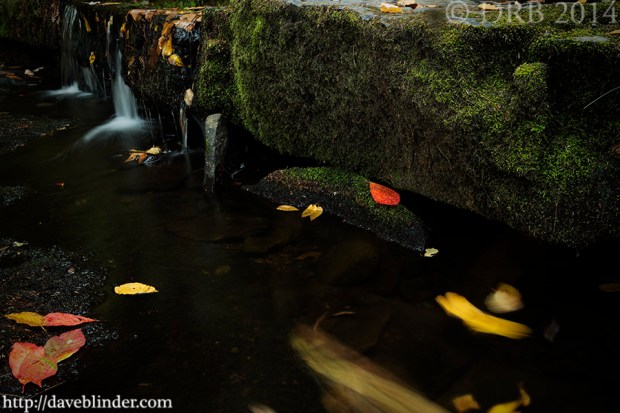
With the days in New Jersey growing gradually colder and shorter, I am always a bit remorseful to see the dwindling of the vibrant insects that I like to photograph.  Other wildlife like Reptiles and Amphibians also become less active.  However, the cooler airs bring visiting songbirds that seldom or never breed in our Mid-Atlantic region.  The Savannah Sparrow is a grassland bird with very fragmented breeding habitat in NJ, but the birds that bred further North now visit in search of food.

Passerculus sandwichensis

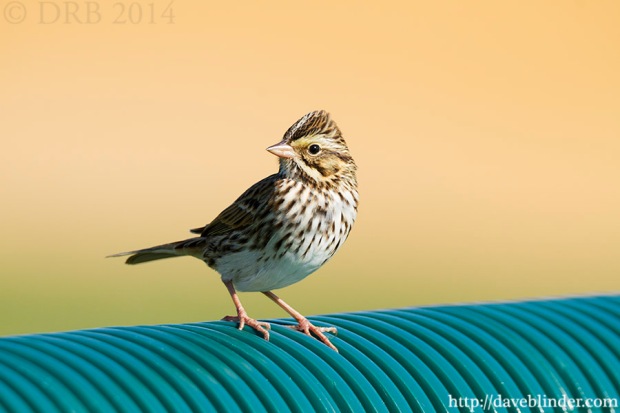
A migrant Sparrow pauses very briefly in New Jersey atop the fence of a local ball field. Photo taken handheld with the Tamron SP 150-600mm VC Lens and the Canon EOS 7D.

Above photo of a Savannah Sparrow was taken handheld with the Tamron SP 150-600mm VC Lens and the Canon EOS 7D.  A manual exposure of 1/500th F/8 ISO 400 was set, and I believe this is the only frame where I captured a good head angle before the small bird flew off.

DSLR Nature Video in HD: Great Spangled Fritillary butterfly

Here is some DSLR nature footage that I shot in the tail end of this summer in New Jersey.  This was one of my first times using a fluid head on a tripod, and I practiced smooth vertical and horizontal panning motions to avoid jitters in the video.  The YouTube video below is a splice of 3 separate angles of a Great Spangled Fritillary in butterfly, a species I consider one of our most regal flighty residents.

Please watch in 1080P for full resolution

Equipment used in filming and production: Tamron SP 90mm VC F/2.8 1:1 Macro Lens, Canon EOS 60D DSLR, Manfrotto 700RC2 Mini Video Fluid Head, Manfrotto 055x ProB Tripod.

The acoustic guitar is my Washburn D10 CE using mostly Major 7th chords.

Shadow Darner in Autumn

This another “right place, right time” photo, one of my favorite kinds of photography.  There was a light rain when I went out to shoot so I had the mindset to do long exposures of running water (which I did).  I did a brief walk around a pond before heading home and barely noticed this Shadow Darner dragonfly at rest against brilliant fall foliage.

Fall leaves and dragonfly in NJ

A dragonfly at rest against red and green October foliage. Taken with a Tamron all-in-one lens and an Olympus Micro Four Thirds Camera.

Taken with the Tamron 14-150mm Di III Lens, a circular polarizing filter, the Olympus PEN E-PL3 Micro Four Thirds Camera, and a carbon fiber tripod.  Camera settings 1/20th F/8 ISO 200, Auto White Balance, RAW Image Format.

Fog on Lake Jean

Having woken up at 4AM to make a sunrise trek from New Jersey to Ricketts Glenn, I had tripod in hand and was ready to capture mirror-like images of the morning sun hitting the horizon over Lake Jean.  However, that wasn’t to be, the dense fog rendered visibility to about 20 feet.  Not a problem!  When interesting atmospheric and weather conditions occur you just roll with the punches!

PA Fine Art Photo

Long exposure landscape photo of a foggy morning at Ricketts Glen State Park in Pennsylvania.

The above photo was taken with the Tamron 18-270mm VC Lens and the Canon EOS M Compact Systems Camera with the shutter at 5seconds, an aperture of F/13, and ISO 100.  Taken in Aperture Priority Mode with -1/3 exposure compensation dialed in.  Carbon fiber tripod, Spot Metering, 2-second delay, Auto White Balance, RAW image format.

Beech Leaf and Cascades

This morning I had the pleasure of meeting up with Ed Heaton, a Tamron Image Master, renowned  for his landscape photography expertise and his equally talented son Zach to capture some views of Autumn in Pennsylvania.

Most of my photos today were with the Tamron 14-150mm Di III Lens and my Olympus PEN E-PL3 Micro Four Thirds Camera.  A small and lightweight combo that can capture a great diversity of scenery.  Here is one of my favorites:

Fine Art Waterfall Photograph

Autumn in Pennsylvania captured with the Tamron 14-150mm Di II Lens and the Olympus PEN E-PL3 Micro Four Thirds Camera.

Camera settings: 14mm (28mm equivalent) @ 1/2s F/9 ISO 200.  Aperture Priority Mode -2/3 EC, Auto White Balance, RAW file format, Spot Metering, 2-second delay.  Camera mounted on Benro carbon fiber tripod.

Motion Blurs in Photography: How Much is Too Much?

…or how little is too little.  Quite a subjective topic, and of course there are no laws in the arts while “rules” are merely guides.  Having done a lot of nature photography in the past seven-odd years, I generally find that my first impression when proofing my own photos is what appeals most to me aesthetically even in the long run.  Do viewers and peers share my visual preferences?  I’m not sure.  Please do feel free to tell me how you feel about these photos in my comments section.

Today’s subject material ended up being the common Pokeweed plant.  I haven’t done many abstract closeup photos before, so I tried some different camera motions to try to coincide with the shape of the berries and stem.  All photos taken with the Tamron SP 90mm VC F/2.8 1:1 Macro Lens and the Canon EOS 60D, handheld.

#1 – My finalized photo:

NJ Fine Art Abstract Photo

Optimized image with intentional camera movement, ICM.

Settings for above photo: 1/5th F/11 ISO 100.  A slight circular motion of the camera was made.

#2 A split screen comparison of the SOOC shot versus my end product:

photoshop comparison

Lower left is the straight out of camera shot, upper right is what I deemed to have a good amount of contrast for web viewing.

#3 An outtake, not enough motion makes this look sloppy to me

Phytolacca americana

A slow hand movement has rendered a fair amount of sharpness on the subject but still left faint signs of blur.

Above photo settings: 1/5th F/11 ISO 100.  Camera was moved in a slow fashion.

#4 Another outtake.  To me, the subject is unidentifiable and this photo lacks a sense of order:

very blurry view of foliage

Created with a very fast downward motion of the camera as the shutter was closing.

Above photo settings: 1/5th F/11 ISO 100.  Camera was moved in a very quick fashion.

Which do you think looks best?

The best tripod head for waterfall photography is….

…not a fluid video head.  I found that out the hard way.  They work great for static HORIZONTAL shots, but they lack the slot on ballheads that rotates the camera to a vertical orientation.  My Manfrotto 055x ProB does provide a workaround, because the extending center column can tilt the mounted camera by 90 degrees.  Next time I’m going to just bring the correct ballhead with me.

NJ waterfalls picture

Waterfall photo taken in Morris County New Jersey. The equipment utilized was the Tamron 14-150mm Di II all-in-one lens and the Olympus PEN E-PL3 Micro Four Thirds Camera.

Above photo taken with the Tamron 14-150mm Di III Lens, the Olympus PEN E-PL3 M4/3 Camera, and a Manfrotto tripod.  A 52mm circular polarized was mounted onto the lens to lower reflections and increase exposure time.  Camera settings: 14mm (28mm full frame equivalent), 0.6s F/10 ISO 200 in Manual Exposure Mode.  Auto White Balance, Stabilization off, 2-second Delay, and Single Point focus near the Maple leaf.

Rethink the most obvious shooting angle: Green-striped Darners

Photos taken yesterday in Sussex County, New Jersey.  I was actually trying to take a macro shot of a caterpillar in the shade (quite frustrating) when I saw these two large dragonflies in the mating wheel position fly near me and land.  I approached slowly with macro lens in hand and got very lucky that they were not startled off.  Haven photographed insects quite a bit the past few years, it’s only natural to look to capture them both together in the same frame without having any of their appendages extend beyond the frame.

Shot #1:

macro odonata photo

A few of a male and female darner in a typical reproductive pose. Photo taken in Sussex County, New Jersey with the Tamron SP 90mm VC F/2.8 Macro Lens and the Canon EOS 60D DSLR.

Metadata: 90mm, 1/640th F/3.2 ISO 100, handheld with VC.  Manual Exposure.

I NEARLY walked away haven taken a pretty sharp frame, but I thought “what the heck” why not try a true macro photo with high magnification on one dragon’s face.  It took 1 or dozen frames to get a handheld shot in focus at that magnification, but to me it created a photo with a much higher “wow” factor.

Photo #2:

macro odonata face photo

An intimate view of a Green-striped Darner showcasing vivid lateral coloration. Photographed with the Tamron SP 90mm VC Macro Lens + Canon EOS 60D in NJ.

Metadata: 90mm, 1/100 F/5.0 ISO 100, handheld with VC.  Manual Exposure.

It is certainly subjective to which shot is “better”, but the 2nd is more to my liking.  By rethinking about possible compositions I have 2 drastically different photos of the same subject taken a minute or two apart.  Quality nature photography is seldom performed in a hurry.  I have always been an advocate of the phrase “haste makes waste”.

Optimizing Photo Contrast for the Web: Creek and Fallen Leaves

In my fairly early years of photography, I got caught with the ETTR bug.  Is that a fatal virus?  Nope.  ETTR is an acronym which stands for Expose To The Right.  This ideology is based on the idea that a bright exposure with a histogram pushed as for towards the right (brightness side of histo) is the path to maximum image quality in long run. When exposing to the right, a user wants to make sure the highlights are not clipped or blown out of gamut.  Lost highlights can’t be recovered much, there are no x’s and o’s on your memory card for your camera or computer to look at.  On the flip side, having a slight overexposure of your shadow areas DOES bring in extra information in the pixels.

RAW PhotoShop workflow

A side-by-side comparison of my post-processed file versus the SOOC shot.

The above illustration hopefully shows how I “season to taste” on a landscape photo that I took yesterday.  Setting the black level and white level can be a matter of personal preference, there are no hard-set rules.  I like my pictures to tell a believable tale by retaining the integrity of the scene but I also want plenty of contrast so that my upload or print will “pop”.  For this particular photo I used the Curves tool to bring the dark areas from a medium tonality to a darker tonality.  This provides greater separation between the highlights, midtones, and shadows.  I’ve also added a slight vignette which helped to “burn in” some bright corners from the original photo.

NJ Landscape Photographer

Optimized image, originally exposed to the right. Taken with my Tamron 18-270mm VC Lens and my Canon EOS M 18.0 MP Compact Systems Camera. Manfrotto tripod used for stability and a 3-stop Neutral Density filter was used to lengthen exposure time.

Finalized photo is above.  A landscape nature frame taken in Pennsylvania.  The equipment used includes a Tamron 18-270mm VC Lens, a Canon EOS M Camera, a 3-stop Neutral Density Filter, and a Manfrotto Tripod.  Metadata: 2.5s F/13 ISO 100, 27mm in Manual Mode.