Image Optimization: An Eastern Chipmunk

I will precurse the photos with a disclaimer that I find it difficult to walk by the enumerated Eastern Chipmunk without taking a picture EVERY SINGLE TIME.  That being said, below is a peak at my RAW conversion workflow for a new wildlife photo.

nature photography photoshop workflow

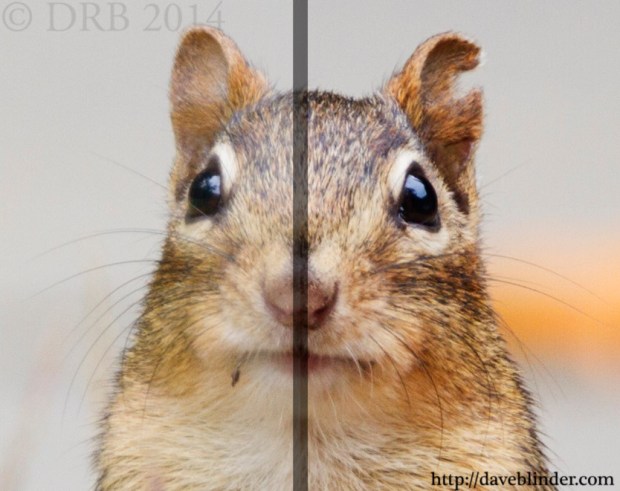
Left side is with my saved Camera RAW defaults applied. Right side is my output image with contrast and further sharpening and noise reduction applied for web/general print.

The above composite is a megacrop created only for the purpose of showing my 2 minute plunderings in the “digital darkroom”.  Get the settings correct in-camera, expose to the right, and make sure the initial file is sharp.

New Jersey Wildlife Photographer

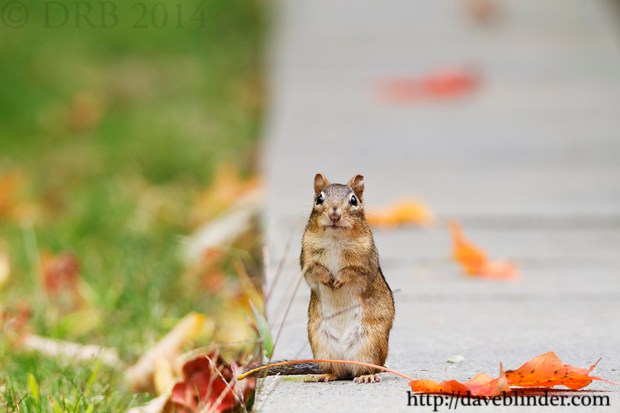
A small brown rodent takes a break from fattening up on acorns to ponder what the heck this human is doing.

1/80 F/8 ISO 400.  Taken with the Tamron SP 150-600mm lens, the Canon EOS 7D, and a Manfrotto tripod with fluid head.

I got lucky that the chipmunk paused just behind a couple of vivid fallen leaves.  To me, they are the icing on the cake and a fortunate happenstance.

Optimizing Photo Contrast for the Web: Creek and Fallen Leaves

In my fairly early years of photography, I got caught with the ETTR bug.  Is that a fatal virus?  Nope.  ETTR is an acronym which stands for Expose To The Right.  This ideology is based on the idea that a bright exposure with a histogram pushed as for towards the right (brightness side of histo) is the path to maximum image quality in long run. When exposing to the right, a user wants to make sure the highlights are not clipped or blown out of gamut.  Lost highlights can’t be recovered much, there are no x’s and o’s on your memory card for your camera or computer to look at.  On the flip side, having a slight overexposure of your shadow areas DOES bring in extra information in the pixels.

RAW PhotoShop workflow

A side-by-side comparison of my post-processed file versus the SOOC shot.

The above illustration hopefully shows how I “season to taste” on a landscape photo that I took yesterday.  Setting the black level and white level can be a matter of personal preference, there are no hard-set rules.  I like my pictures to tell a believable tale by retaining the integrity of the scene but I also want plenty of contrast so that my upload or print will “pop”.  For this particular photo I used the Curves tool to bring the dark areas from a medium tonality to a darker tonality.  This provides greater separation between the highlights, midtones, and shadows.  I’ve also added a slight vignette which helped to “burn in” some bright corners from the original photo.

NJ Landscape Photographer

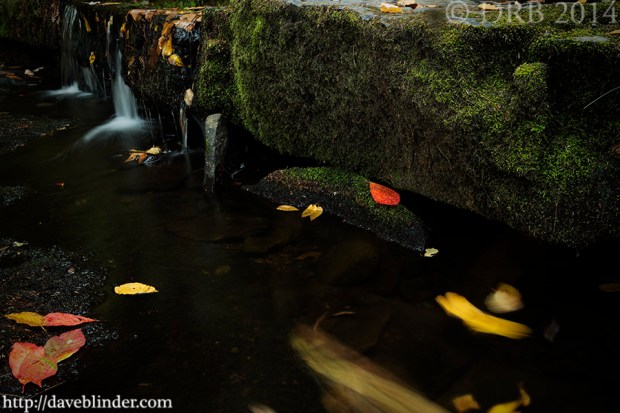
Optimized image, originally exposed to the right. Taken with my Tamron 18-270mm VC Lens and my Canon EOS M 18.0 MP Compact Systems Camera. Manfrotto tripod used for stability and a 3-stop Neutral Density filter was used to lengthen exposure time.

Finalized photo is above.  A landscape nature frame taken in Pennsylvania.  The equipment used includes a Tamron 18-270mm VC Lens, a Canon EOS M Camera, a 3-stop Neutral Density Filter, and a Manfrotto Tripod.  Metadata: 2.5s F/13 ISO 100, 27mm in Manual Mode.

Selective Sharpening in Nature Photography: American Black Bear

My typical nature photo post-processing workflow is very short and sweet unless I have to remove sensor dust spots from shoot at a vary small aperture.  I do like to present my images as realistically and un-manipulated as possible.  My still image format is always camera RAW to get the best possible dynamic range and so that I can make my own decisions over noise reduction and sharpening.  I had the great fortune of finding a wild Black Bear descending a tree in Northern New Jersey today.

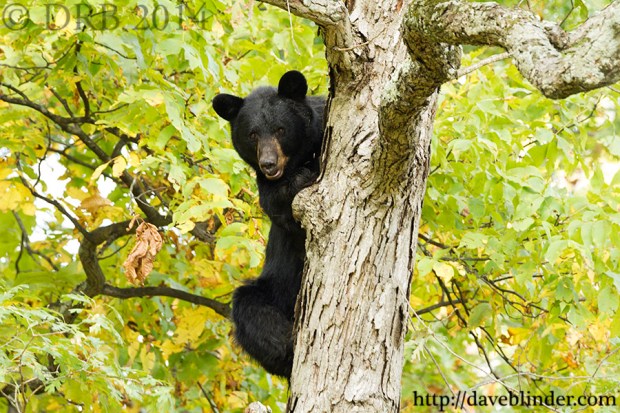
Here is my finalized and optimized image with my typical watermarks and downsized at 900px as I generally do for web usage:
ursus american

A wild Black Bear descending a tree in North NJ. Photographed with the Tamron SP 150-600mm VC, the Canon EOS 7D, and a Manfrotto tripod.

Taken with a tripod-mounted Tamron SP 150-600mm VC Lens and Canon EOS 7D.  I had no time to prepare for the shot or change my camera settings.  I had previously dialed in ISO 800 F/8.0 +2/3 Exposure Compensation in Aperture Priority Mode, so the shutter speed was to be determined by my camera’s meter.  In this particular shot my 7D did a good job of gauging the brightness and I was left with a shutter speed of 1/80th of a second and a good exposure.  In the world of wildlife though, this is a relatively slow setting and prime for blur of subject movement.

Below are 100% crops to reveal what is really going on behind the scenes in my “digital darkroom”

RAW versus JPEG

On the right is a very unflattering view of my unprocessed RAW at high magnification and on the left is a slightly more flattering view of my output JPEG at the same magnification.

As you can see the eye and fur definition is lacking on the SOOC file on the right.  The Tamron SP 150-600mm VC is very sharp near the 400mm focal length and at apertures like F/8.  Unfortunately AI Servo focus is often less accurate than One-Shot focus.  Other reasons for image softness may include: very slight subject movement, auto-focus sensor slightly off the bear’s eye, shooting in the shade (low contrast on subject), and perhaps the panning movement on my tripod head.

After my initial default global sharpening of the RAW file, I applied an additional low-intensity High-Pass Sharpening layer.  I still was not happy with the definition on the bear’s face.  I created an additional layer of global High-Pass sharpening, but this time I erased the effect off of the background to prevent introduction of widespread digital noise.  I also feathered the remaining sharpening a bit, by tracing the bear’s outline with an eraser tool set to 50% to maintain a natural transition from subject to foreground.  This is one method of performing selective sharpening to optimize images and get the best out of your photos.

Happy to answer any questions about my workflow if you leave them in the comments.