Tamron 14-150mm + Olympus PEN E-PL2 sharpness

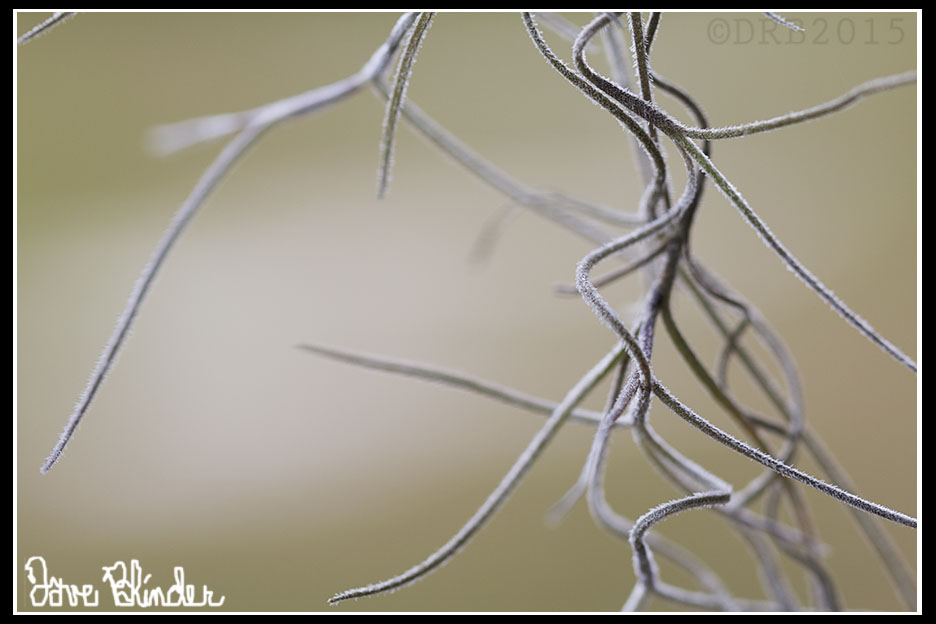
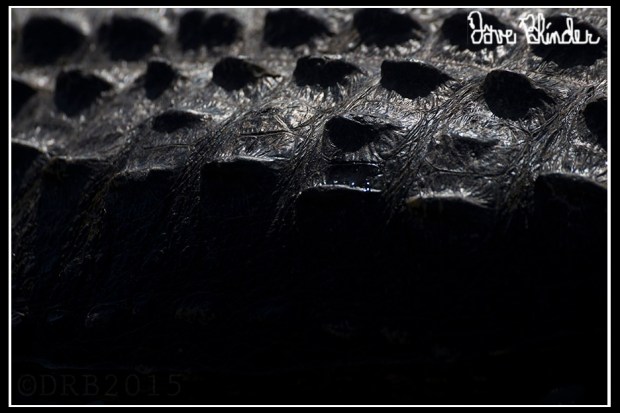
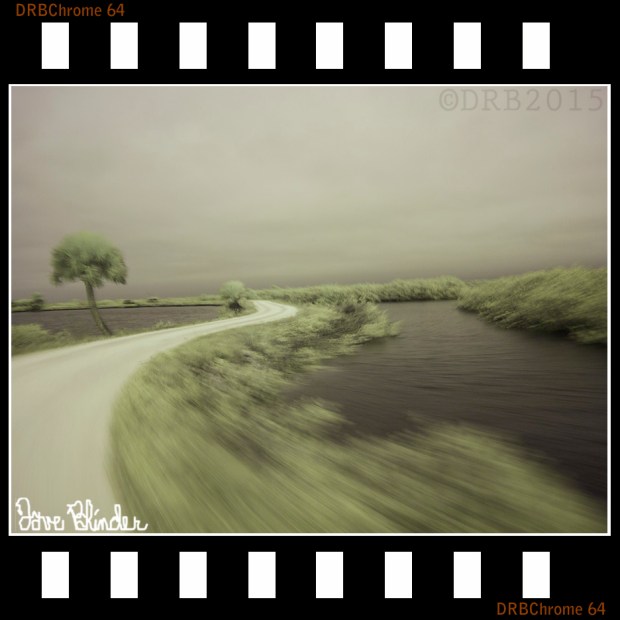
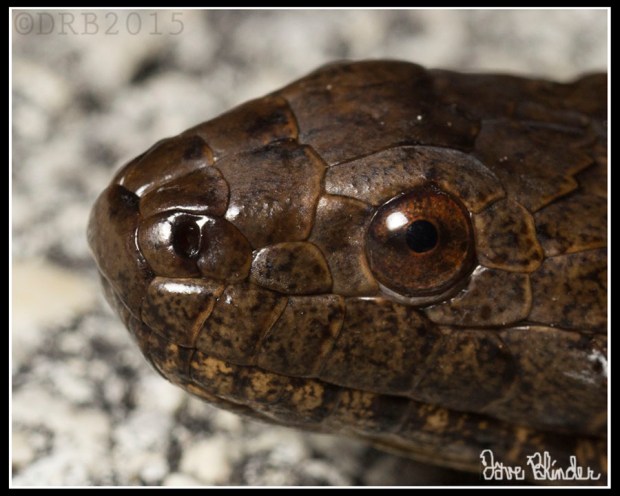
Since having my Olympus PEN converted to infrared (IR + UV spectrum to be precise), I’ve noticed a really great amount of sharpness in my photos.  The Tamron 14-150mm Di III lens natively takes very nice photos, and I also believe that IR photos may have greater clarity than our typical visible light spectrum.  Below is a 200% crop of a nature photo I took today with the Tamron 14-150mm Di III, infrared-converted PEN E-PL2, and my Benro carbon fiber tripod.  No filter on the lens.

Infrared photo detail

Photo taken with #Tamron 14-150mm Di III lens and #infrared converted #Olympus PEN E-PL2 micro four thirds camera.

Below is a view of my full-sized web photo:

NJ Fine Art Photo

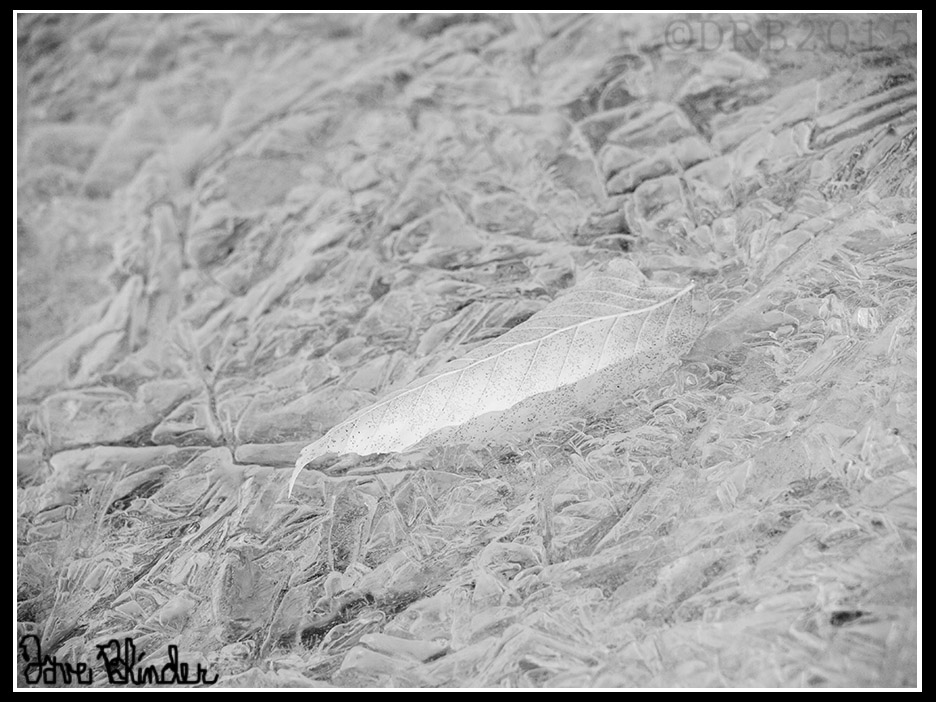
A #monotone image captured with the #Tamron 14-150mm Di III and infrared converted #Olympus PEN E-PL2 micro four thirds camera.

Exposure notes – 150mm (300mm in 35mm terms), F/9.0, 0.6s, tripod, manual white balance (kelvin).

The effects of a circular polarizing filter on a superzoom lens

I’d been recently caught off guard by the lack of sharpness on the long end of my 16-300mm VC lens so I performed a brief test with and without my frequently used 67mm circular polarizing filter. The drop off in sharpness is completely the fault of the filter. At 16mm with my polarizing filter mounted I do get a very sharp image, but at 300mm with the polarizing filter the photos become very hazy. There is no noticeable loss of sharpness from wide to telephoto end without the filter.  The filter used is a 67mm slim Zomei filter.

Remember to always conduct sharpness tests on lenses without filters, and if you want to test the sharpness of the filters themselves you must do so in controlled exposures.

*Note that none of these photos are intended to be flattering shots, these are uncorrected jpegs in harsh backlighting.

Sharpness check with filter

Upper left – 16mm F/8 ISO 100, no filter. Upper right – 16mm F/8 ISO 100, slim 67mm CPL filter. Lower left – 300mm F/8 ISO 100, no filter. Lower right – 300mm F/8 ISO 100, slim 67mm CPL filter.

HDR Post-processing: Pond in Winter

I’ve been using the auto-bracket feature on my Canon EOS T5 Rebel a bit lately.  I believe some cameras allow you to take up to 5 bracketed shots with the push of a button, but the T5 is limited to 3 shots.  The intervals of the related under and over exposed shots are however, customizable.  I normally distance each photo by about 2/3 stops of light.  While still regularly checking the histogram on my LCD, the bracketing feature is particularly helpful for daily landscape photography, where highlight areas are easily clipped.

Below is an HDR image created from one such bracket of exposures.  I left most of the HDR sliders in default positions and this created a fairly natural looking jpeg.  I could be imagining things, but I still think I see slight halos on the trees in the horizon though…. For further comparison I’ve included a split screen comparison with my single best frame against the HDR output.  This makes it easier to see how detail was gained in both the sky and foreground.

HDR Landscape Photo

3 bracketed raw files are merged together for a winter landscape photo in #NewJersey. Photo taken with the #Tamron 16-300mm VC lens and the #Canon EOS T5.

Natural looking HDR photo

Left side of image is from processing a single #raw #photo as best I could. Right side is from an automated #HDR processing of three raws.

Florida Travel Photography: Spanish Moss Detail

Below is a handheld capture of Spanish moss using the Tamron SP 90mm VC macro lens.  By getting in very tight on the subject, a large visual emphasis is placed on the individual curls of the plant itself.  We as viewers can also see a bit of surface detail on the moss, a characteristic I was previously unfamiliar with.  To balance out the composition of this macro frame, there is an intentional inclusion of negative space.  Negative space equates to a nice out of focus background here.  As always the photographer needs to make educated decisions about what to include and what not to include in the frame.

Florida Macro Photography

An intimate view of a strand of Spanish Moss exposes naturally formed spirals. #Florida #travel photo taken handheld with the #Tamron SP 90mm VC macro lens and the Canon EOS T5 DSLR.

New Jersey Nature Photography: Icicles and Droplet

I stumbled upon the challenge of trying to make a sharp capture of water droplets falling off an icicle today.  The timing required a little observation and a lot of luck.  To freeze the action, I had to increase the light sensitivity of my Canon Rebel by selecting ISO 6400.  Naturally, this is going to introduce a great deal of chromatic and luminance noise.  I did some selective post-processing via manual selections and multiple layers to optimize my file for print and web.  Heavy noise reduction was only run on the background layer and my second pass of sharpening was only applied to the foreground.

Detail crop showing selective post-processing:

layered image editing

A melting droplet is suspended in sharply air, but a lot of random grain has been generated. This cropped-in view only has my #selective #sharpening and #noise reduction applied on the left side.

My finalized jpeg for web usage:

Winter icicle photography
Time briefly stands still… for 1/3200 of a second in this #photo of a melting icicle. Photo taken at ISO 6400 on a #Canon T5 with the #Tamron 16-300mm VC lens.

Florida Nature Photography: American Alligator

It is always a good idea to “work the scene” when out performing nature photography.  Our instincts may lead us to shoot a subject from a specific angle that has worked well for us in the past, or maybe even to mimic what we have seen in a magazine.  However, there are nearly infinite ways to image an animal, plant, or landscape when we factor in using different focal lengths, varied camera angles, and also begin to think abstractly.  One alternative type of shot is  to fill the frame with nothing but the texture of a live animal’s skin, fur, or feathers.  In this case we are looking at the “business side” of an American Alligator’s body.  Yes, the animal is both free and alive.

Alligator photo

An intimate view of the ridges atop an Alligator’s body. All other contextual clues are eliminated from the frame. #Photo taken with the #Tamron SP 70-300mm VC lens and the #Canon 6D.

A Florida butterfly and some words in photo image quality

A friend on Facebook asked for details of the shot so I wrote out a bit of my technique and criteria for detail photos of butterflies.  Note that for an abstract capture, these ideas can go right out the window!

Florida butterfly photograph

#Florida nature #photo of a Zebra Heliconian butterfly. Taken with the tripod-mounted #Tamron SP 150-600mm VC lens and the Canon EOS 60D DSLR.

Question I was posed:

“Was this shot using a tripod?? so clear.. somehow i need to work on that. mine are almost never this sharp..”

My response(s), hopefully helpful:

Dave BlinderYep, 1/200th F/8 ISO 400, Vibration Compensation (IS), carbon fiber tripod. Sharp butterfly shots not possible near 600mm without tripod. When I shoot butterflies with my 90mm macro lens I do 75% handheld. Average time I spend photographing an individual butterfly is anywhere between 5mins and 1.5hrs. I don’t leave until I verify I have the eye perfectly in focus on the LCD.”

If the butterfly’s eye is not in sharp focus I do not post the photo online.

Same technique for dragonflies. Nearly identical for birds, but if the bird is distant and I don’t think I can fill 20% or more of the frame I skip the shot. My definition of a sharp eye is viewing the texture on the surface of the subject’s eye nearest the camera.

Florida Nature Photography (and Photoshop Action Writing)

I am mostly done with my first round of edits from the recent photography trip to Florida… approx 3000 raw images.  I’m interested to see how many photos I will process into JPEGs for possible web and print usage, my estimation might be 15%.

Anyhow, below is one of my shots from the trip.  The photo is clearly a bit abstract because it was not only taken with my infrared converted Olympus PEN, but I also dragged the shutter while shooting from a moving car.  This intentionally introduced some motion blur, to add further dynamics to the scene.

Below I have uploaded not only my web version of the jpeg (for direct uploading to Flickr and Facebook), but also my Instagram version of the jpeg.  I have written a short Photoshop Action for the framing of the specific hosts.  Instagram restricts uploads to a square aspect ratio, so I chose to record my own action to drop my micro four thirds photos directly into a square faux film frame.  No cropping or stretching of my images needed, and it is possible that the film frame adds an extra bit of flare to the IG uploads.  For any questions of Photoshop Actions or requests for your own personalized Action please contact me.

Both photos taken with the Tamron 14-150mm Di III lens and the Olympus PEN EPL2.

Florida travel photo

An infrared photo from Merritt Island National Wildlife Refuge in #Florida. I set a manual exposure and dragged the shutter to introduce a bit of motion blur. Photo taken with #Tamron 14-150mm Di III lens and #Olympus PEN EPL2

Instragram Square Photo

A #Photoshop Action was recorded to #automate this process, now all I have to do is click one button to repeat the process and prepare my uploads for #Instagram

Florida Nature Travel Photography: Roseate Spoonbill

My recent trip to Merritt Island National Wildlife Refuge in Florida yielded my first views of the radiant Roseate Spoonbill.  Spoonbills are fairly large wading birds (similar in habit to Herons) with varying degrees of pink on their plumage.  Their easily recognizable color and shape make them a favorite for bird photography.  For this creative flight blur capture I set my exposure in manual mode to have complete control over the outcome of the photo.

Exposure settings: 1/25s F/16 ISO 100, 483mm handheld.

BIF photography

A creative motion capture of Roseate Spoonbill at Merritt Island National Wildlife Refuge in Florida. Bird #photo taken with the #Tamron SP 150-600mm VC lens and the #Canon EOS 60D DSLR.

Florida Nature Travel Photography: Brown Water Snake

Many nature photographers head to Florida to photograph birds because they are abundant, cooperative, and colorful.  Some head down to shoot landscape images of the great wilderness areas.  Probably more than a few go just to eat Key Lime Pine.  Others go for the snakes.

Below is one of the Snakes I saw on this trip, a Brown Water Snake.  This stocky serpent has a head shape that looks a bit look a dangerous viper, but there is no venom to be found in this species.

FLA Wildlife Pic

A Brown Water Snake absorbs some of the remaining heat from the road, shortly after sunset. #Photo taken handheld with the #Tamron SP 90mm VC macro lens, the #Canon T5 DSLR, and a 270EX II Speedlite with homemade flash diffuser.

FLA Water Snake Crop

A magnified view of the eye and face of a Brown Water #Snake in #Florida. Photo taken with the #Tamron SP 90mm VC macro lens.