Image retouching – Background Repair

Here is a “background repair” retouch that I did this morning on one of my own photographs.  Looks like an unsightly out of focus branch needed to be fixed here.  Luckily, out of focus areas not intersecting anything of importance can be quick fixes.  In the central pane you can see that I duplicated a section of the clean background and roughly aligned it into position.  On the rightmost frame I have used a few blur techniques to blend the new with the old.

It’d be a shame to let a sharp photograph of a Common Yellowthroat go to waste!

Retouching questions or services needed?  Just ask!

Photoshop Retouching Background

A view of the progression of some photo #restoration and #optimization. Performed in #Photoshop.

Photo Editing: Adding a digital neutral density filter

I made my way to Orange County, New York today to shoot some of the more rustic areas following the scenic snow our area accumulated.  When I am doing landscape photography, my goal (aka everyone’s goal) is to capture as much dynamic range as possible in the raw file.  This is accomplished by ETTR (exposing to the right), and getting the brightness histogram as far right as possible without blowing the highlights out of the gamut.

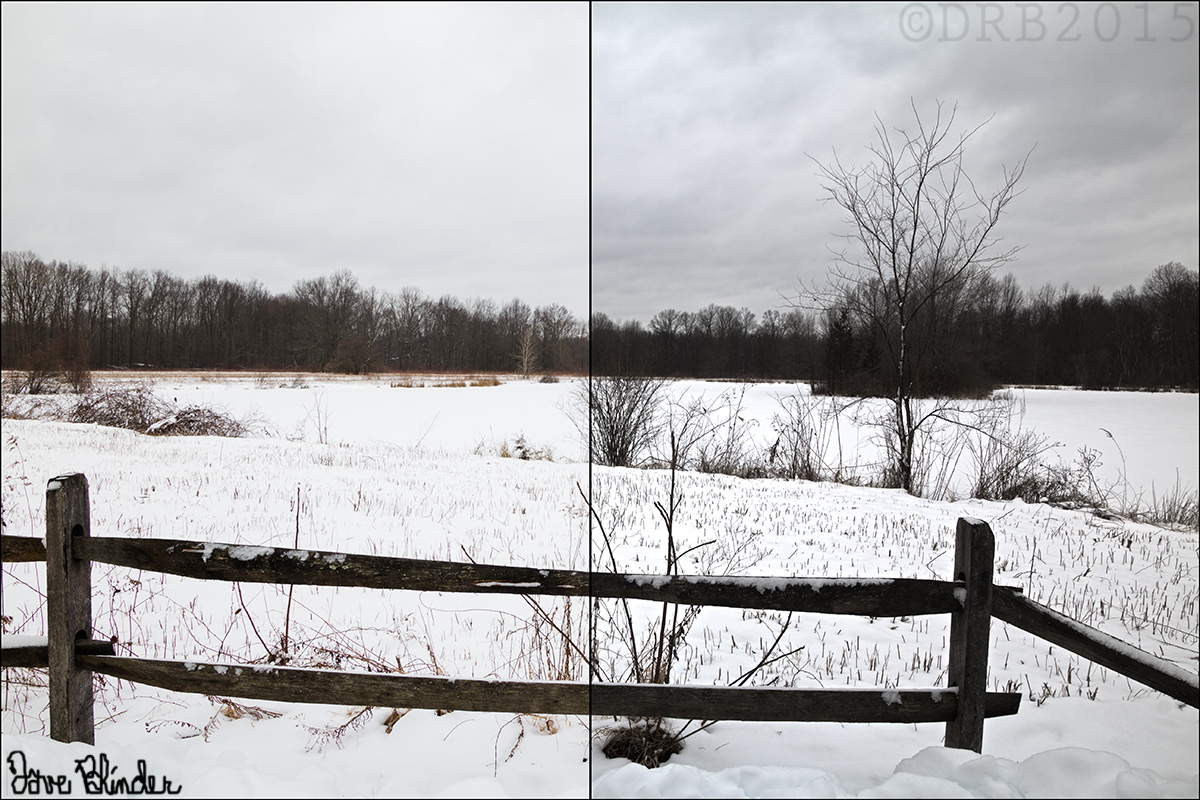
The raw file will always be lacking in contrast before post-processing, but generally a global Curves Adjustment Layer will do the trick for me.  As we can see below, there is a bit of cloud detail in the sky in my original shot, but in general it does appear featureless.  Featureless sky = boring photo.  To give the sky a little pop, I added a new blank layer in the digital darkroom, and simply did a directional fill with the gradient tool (black to transparent).  I also changed the layer blending mode to “overlay”.  Results below.

Mostly unprocessed view, note that I adjusted the horizon and had to “add canvas” after a slight rotation.

NYS scenery photo

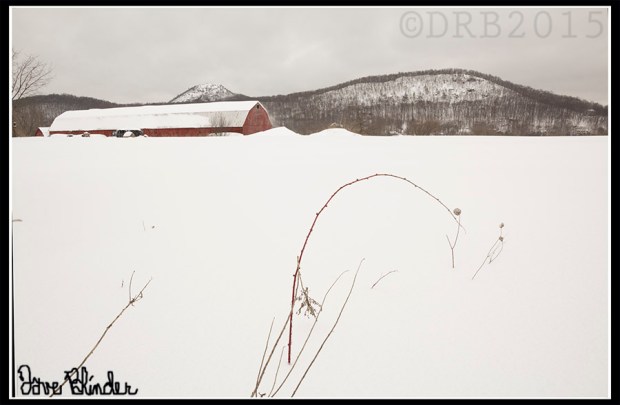
Not a great finished product, but it is a start. #Composition mostly adheres the the rule of thirds, and I positioned my #camera to have weeds fill in some negative space in the snowy foreground.

My finalized jpeg for web view.  Digital ND filter superimposed over sky, and foreground repaired after slight rotation.

NYS Winter Fine Art Photo

#NYS Winter scenery photo. Taken handheld with the #Tamron 16-300mm VC PZD lens and the #Canon EOS T5 #DSLR

Another successful outing with the new Tamron All-In-One lens.

HDR Post-processing: Pond in Winter

I’ve been using the auto-bracket feature on my Canon EOS T5 Rebel a bit lately.  I believe some cameras allow you to take up to 5 bracketed shots with the push of a button, but the T5 is limited to 3 shots.  The intervals of the related under and over exposed shots are however, customizable.  I normally distance each photo by about 2/3 stops of light.  While still regularly checking the histogram on my LCD, the bracketing feature is particularly helpful for daily landscape photography, where highlight areas are easily clipped.

Below is an HDR image created from one such bracket of exposures.  I left most of the HDR sliders in default positions and this created a fairly natural looking jpeg.  I could be imagining things, but I still think I see slight halos on the trees in the horizon though…. For further comparison I’ve included a split screen comparison with my single best frame against the HDR output.  This makes it easier to see how detail was gained in both the sky and foreground.

HDR Landscape Photo

3 bracketed raw files are merged together for a winter landscape photo in #NewJersey. Photo taken with the #Tamron 16-300mm VC lens and the #Canon EOS T5.

Natural looking HDR photo

Left side of image is from processing a single #raw #photo as best I could. Right side is from an automated #HDR processing of three raws.